

If your old chair is still usable, but you do not like pattern that is on them, gather the necessary tools and get with furniture upholstering. Do not easily to write off outdated chairs just because of distasteful fabrics in which they are coated. As long as their construction is strong or as long as the wood is preserved, you can do miracles with a little fabric and creativity these steps will show you how to easily upholstered chairs and after short reparation your old chair will be like new.
Materials needed:
• pliers
• paper and pen
• marker
• scissors
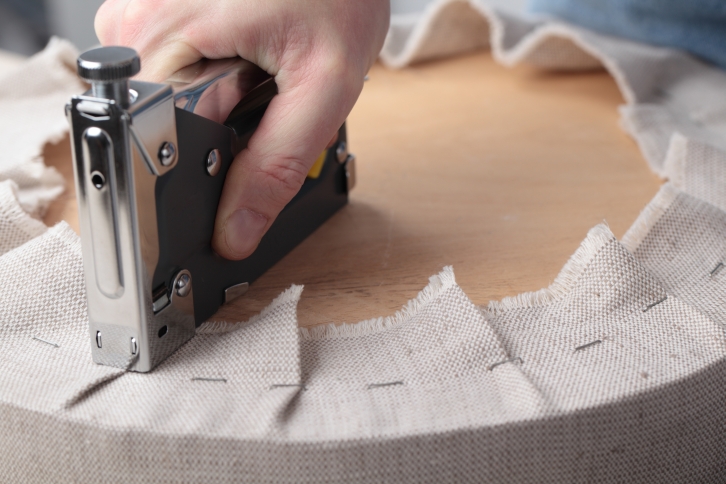
• staplers and staples
• 1.3 cm thick glass wool (for filling)
• fabric for upholstery (about 5 meters)
• pin
• veldt cable
• sewing machine
• upholstery moldings with nails
• adhesive fabric
• decorative pins or rivets
• nails
• file
• black lightweight fabric for the bottom part of the chair
• duct tape
Step 1
Carefully remove the lower surface and all the pieces of fabric, and use the pliers and gently remove the pins. Photograph assembled chair and mark the location of parts armchairs in order to know how to re-assemble after the upholstering. Keep belts for textiles to be able to use them later. Try not to tear the fabric because you will be able to use it again. If the existing staples or nails are very tight, loosen them by placing a straight edge screwdriver under the screw and tap the handle with a hammer. Use scissors to separate the fabric at the seams.
Step 2
Remove the old filling from the back of the chair and the seat if it is collapsed or stained. Check springs and the construction and repair them if necessary. Sand, clean and paint the frame of the chair and allow it to dry. Cut a piece of glass wool to cover a chair and cut another piece for the seat. Staple each piece in its place and fold neatly around the corners.
Step 3:
Place the original fabric on a new fabric and draw the shape that is to be cut. Pay attention to the position, colors and motifs, as well as the direction of the track to which material should be set. Set in place and cut around the pattern, leaving 5 cm of excess material under the original pieces, which you will cut after the sapling it.
Step 4:
Place the pieces of fabric to the frame of the chair. Pull the cloth and tighten it as much as possible to the back of the chair. Staple as many times as it takes to secure a nice cloth and tighten it to stand smoothly. Be sure that the fabric is properly stapled on the back. Cut off the extra fabric.
Step 5:
Use old pieces as a model and specify the width and length of the straps, which is necessary to go around the seat. Cut sufficient width and length, allowing a few extra inches needed for fixing the fabric. Join the tape with diagonal seams and additional lane of 1 cm in length. Assemble the two lanes diagonally around straps and sew them.
Step 6:
By holding the right side of the fabric against the seat, staple the fabric nicely around the seat. Add duck tape around the seat to secure the fabric to the seat. Fold the side panel down over the tape and tighten it firmly and secure it to the bottom of the chair. Cut the dangling parts and set up risers neatly.
Step 7:
Place the back of the fabric and how to bend right over the top of the chair back. Apply duct tape to the top and attach to the right place. Fold the fabric back over the tape and pull tightly to the bottom of the chair back. Fold the bottom edges under and staple them to the bottom of the back of the chair. Use fabric glue or tape decorative fabrics to secure the excess fabric at the rear end.